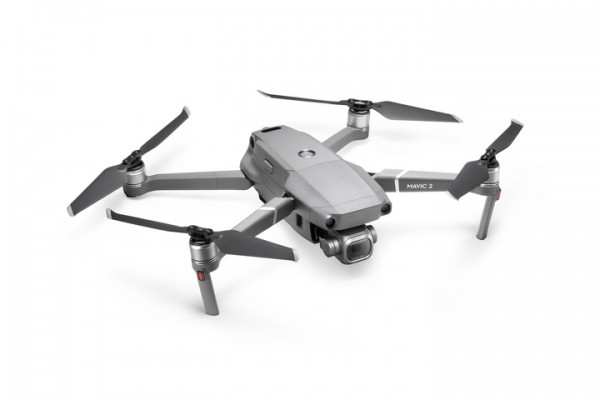
what’s good guys my name is alek nikitian you’re watching no limits on channel and today me and my colleague and fellow youtuber dan from dan’s tube have prepared for you guys the drone pilot’s three pistols of advice from each of us to be a better pilot or to become a better pilot just some pieces of advice guys buy an nd filter for your drone because most of the drones they have fixed aperture of f 2.8 and you cannot adjust the aperture at all only the mavic 2 pro has physical aperture but it’s not enough to be properly exposing at 1 over 50th shutter when you shoot 25 for instance frames per second in russia we shooting 25 fps so basically you do have to buy an nd filter to set the proper shutter speed and i have a review of the filters from freewell v and d filters set of two filters and they are with missed effect you can check it right here or you can use the link down below i guess then we’ll put a link under his video in the description and you’ll find out why it is important in that video if you want to check this out but of course we do need the cinematic movement of your drone footage during the first three or four years of drone piloting i wasn’t using the nd filters and then i started out and i saw a huge improvement in cinematic nests of my picture quality and overall feeling about my drone footage so i highly recommend you using an nd starting off with my first tip for drone beginners and that’s using the dji flight simulator to practice now this is something that is invaluable because you’re not going to damage a real-life drone you’ve already spent hundreds if not thousands of dollars on a flying robot now the last thing you want is for it to crash out of the sky hit into a tree or for it to malfunction in a weird way that you could have avoided if you practice a little bit more so my first recommendation is getting into the dji flight simulator which you can download right now i’ll have a link in the description below to check it out but it’s well worth your time it’s really comprehensive there’s tons of options tons of different
drones to use and it’s really realistic you know you get a lot of like wind realism within there you get like the controls are on point the interface is on point it’s everything that you’d expect from flying the drone in the real world but it’s in a computer simulator where you don’t have to worry about damaging a thousand dollar drone potentially as you navigate through the software there are a ton of options and a ton of different features there is a paid version that you can get but the free version gives you everything you need for this basic test here i wouldn’t recommend spending that extra money unless you really want to but it actually shows you a ton of different drone models so you can go through and see the different drone models that are available out there and they’ve got a beautiful 3d model design to each drone so you can get a close-up on the drone that you might want to buy next or the drone that you’re thinking about buying first it depends at what level or stage you’re at in your drone journey but it just gives you a chance to look into the different drone models and you know where the sensors are on them where the battery is located how it’s going to actually look when you get it in person right in front of you and then from there you have a ton of options to connect different controllers to the software so you can use like an original xbox controller one of the brand new xbox one
controllers or even the actual flight controller from your drone not every flight controller is supported in the dji flight simulator but a fair few of them are supported so just have a look through what is supported connect up your controller to your computer or laptop or whatever you’re using and it will let you know whether it is a compatible controller and then from there you have a chance to actually fly a drone in a virtual world and again the benefit of this is that you get to test it in a controlled safe environment and it is realistic it’s still a game at the end of the day so it’s not going to be the exact same experience you know it’s going to be a little bit more predictable in the fact that it is a programmed video game where the real world isn’t programmed or maybe it is depends on who you’re asking that question to but it does give you a chance to actually control the drone see what the operating system is going to look like see what the actual software from your phone is going to look like the app that you’re using play around with the controls you know see how it responds in different conditions and also play around with the camera functionality play around with you know different drones that you might be looking into getting later on in your drone journey and different environments as well you know there are a few different environments that you can fly through in the free version which again is fantastic you really don’t have to spend that extra money you can play around in a variety of different environments and it’s all available in the free version another benefit of using the dji flight simulator is that you can
play around with different points of view so you can have that point of view where you’re looking down at the controller which is a very common view that you’ll have when you’re on the field you can also use the line of sight view where it like focuses in on the drone so as you fly the drone away it will actually zoom in which is a little unrealistic but it will show you where the drone is in relation to the character which is really important because when you’re flying a drone you need to keep it in line of sight and this actually just shows you how challenging that can be as you know you’re flying around a corner it will be completely out of line of sight then and you’ll lose your orientation it’ll be confusing from this point of view because you can’t physically see which way the drone’s facing or where it’s even located so i think that’s a really good test to show you that you need to be careful you know you need to be mindful of where your drone is and you need to keep it in line of sight but then you also get the interface where you can see the application so that shows you the distance from the drone that shows you the height that shows you a few other metrics that you might need to look into when you’re flying your drone and it gives you a clear interface to show you what you’re going to be seeing when you’re flying your drone so again
if you’re a beginner if you’re starting out in these early phases even if you’re you know a relatively experienced pilot it’s always handy to come into the flight simulator just to test your skills again and just to hone in and become a more confident competent drone pilot use 10-bit codecs when you have this option for instance mavic 2 pro and the dji r2s they both have 10-bit codec and you get extra color information from your drone and you can get much better results after color grading this footage so if you do have this option use it also i have uploaded to the cloud a little lot that you can use to color grade your footage from mavic 2 pro i use the slot a lot lots a lot and i’m really satisfied with the results but be careful and set your white balance correctly of course and do not overexpose your footage this is not raw it’s only 10 bit if your drone doesn’t have 8-bit codec you will use standard picture profile not d-log m or c something only the standard picture profile and be very precise in terms of your white balance and exposure to not overexpose it i’ve been using the standard profile on the dji mini se which i also have a separate review on it’s only 2.7 k in standard profile but the shots are pretty pleasing in my opinion and you definitely can achieve good results but if you shoot in a flat profile with a 8-bit zone and you’ll try to
color grade it you’ll see some artifacts and color banning and you don’t want to have this my next tip is enabling the overexposure warning now this is available in pretty much all dji drones from my understanding even the lower end mini models they all have the option to enable over-exposure warning now this can be quite a overwhelming distracting thing to have like within the interface what it is is it’s the zebra patterns and it can look really overwhelming but what that actually means is that that part of the frame is overexposed now the importance of knowing what’s overexposed is because you want to make sure that your footage is perfectly exposed you know if you want a shot to look crispy if you want it to look sharp if you want it to really catch the attention of people then you do not want the image to be overexposed it’s going to completely lose its detail it’s going to look really washed out and white and it’s just not going to look professional at all so the benefit of having that overexposure warning enabled is you can pick up on that before you get home and see the footage so when you’re on the field flying your drone you can see that wow okay there’s a fair few zebra patterns everywhere it’s looking like it’s overexposed so you can adjust the settings and you can play around with the ev or you can play around with the other settings if you’re in the pro mode and you can adjust that to see when the overexposure becomes less harsh so when there’s less zebra patterns that means that it’s not as overexposed and then you know
that it’s going to be a perfectly exposed shot you can also utilize the histogram to make sure that you’re getting you know a clear bell curve and it’s not going either end of the histogram so if it’s one end or the other it’s going to be either underexposed or overexposed so the histogram alongside the overexposure warning gives you a clear representation of how well the exposure is going for that particular frame that you’re shooting that particular shot when you just get a drone and you fly for the first time you almost always put it like very high and you simply shoot straight away without even moving the drone or moving it just slightly it’s not that cool first of all i prefer to use parallax shots when we have a foreground object and a background object and we go to the site for instance but be careful because not all the drones have the side sensors and they’re not working in all the modes for instance in the mavic 2 pro only in the tripod mode or just like point of interest and doing so you add depth to your shot it’s kind of becoming 3d not 2d shots which is cool and the drone footage looks so
much better when you have this motion in your shot the second cool shot is flying close to objects or through objects like in this shot because you also add depth and the viewer sees that it’s not a flat picture the viewer sees the movement through something and it really amplifies the cinematic-ness of your footage and the third shot is revealing shot so imagine you’re flying from like down there and there is an object and you fly from here to here and you reveal something very important for you it also adds depth it’s kind of three-dimensional and it adds a little bit of drama to your shot my final tip is really important and it might sound like an obvious one it might sound like something you don’t have to think about because it’s a drone and it’s worth thousands of dollars and it shouldn’t fail on you but something really important to do is inspect your drone for faults now this sounds like one of those things that you might just overlook and not even think about but it can save you thousands of dollars if you’ve got a brand new drone like the air 2s and you can prevent anything from happening to it if you can prevent it from malfunctioning mid-air because you’ve actually inspected it and you’ve picked up on something before it became a problem then this is an invaluable tip to remind yourself of regularly like check your drone before every single flight it’s so important and a few specific tips that will really help you with this is i would recommend taking photos of your drone like straight when you buy it this is a brand new drone literally take photos of it like get the battery take it out take photos of the battery so you know the
shape of it you know the form factor you know like how it’s meant to look brand new also inspect the actual body of the drone the arms of it the camera inspect the sensors inspect that the motors spin freely you know these are brushless motors there should be zero resistance they should just glide like that and if you are noticing some sort of resistance there might be a build up of grit dirt dust something in the motors here and if you’ve got a compressed air can with you you can blow that out and dislodge anything in the motors which can actually prevent the motors from overheating you know if these motors overheat mid-air and they malfunction this thing is going to fall out of the sky but you could have prevented that there are some obvious things that you can do here to make sure that nothing goes wrong like i said make sure these spin freely the motors need to spin freely these are brushless motors there should be zero resistance going on here it shouldn’t feel like it’s grinding it should just glide just naturally glide so
that’s what that needs to feel like that’s what that needs to look like as you spin it it’s just effortless you also want to make sure that the arms are you know not cracked if there’s any sort of structural damage and the arm is you know bent or there’s a major like kind of gouge through it or some sort of structural damage that could cause an issue you know there’s exposed wire here potentially that’s been cut by something you just don’t know and if you’re not inspecting it then you’re not going to know the other thing is regularly inspecting the battery making sure that it actually fits into the holster here make sure that it’s not like something you have to force because if you’re forcing it in or it’s not fitting properly there might be an issue with the battery maybe it’s ruptured maybe it started to bubble you know maybe there’s an actual real issue with the structural integrity of the battery maybe the cells are damaged it could just be completely destroyed and if you’re trying to force it in there and pushing it through and you’re just going oh it’s probably going to be fine and you launch that drone and the battery is going to fail at any point then your drone’s going to fall out of the sky so you need to be aware of that and if it starts to happen replace that battery you know take it to a drone repair store and get a new battery in there straight away the other important thing that a lot of people seem to neglect or forget about or aren’t even aware of is that these little sensors here are the obstacle avoidance sensors they need a visual line of sight they need to be able to actually see an obstacle you know like if this is covered
it’s not going to be able to see anything so if you’ve got fingerprint marks on here if you’ve got like some grass that’s lodged in there or sand or dust or you know whatever it may be completely covering that vision then the drone’s not going to be able to avoid an obstacle and it might hit into something which in turn could destroy your drone so again make sure this is clean make sure the camera is clean make sure you’re actually inspecting it and taking good care of it it’s honestly one of the more important things to do that i just don’t see enough drone pilots doing and especially beginners they’re not taught these things and i think it’s really invaluable information to just like actually care about your drone you know inspect it regularly and just get to know it actually really get to know your drone and make sure that it’s regularly inspected for faults so guys how did you like those tips from me and dan please share your thoughts in the comment section below and share your pieces of advice about the drones also in the comment section below also don’t forget to smash the like and subscribe bottles as i say in my videos and hit the notifications bell to get notified when i post my next video or a collab here’s my instagram and a couple of videos for you to watch next my name is alex niketan from russia with love and i see you in the next guys take care bye
Read More: It CHANGED the way I FILM! Review Insta360 Go 2


