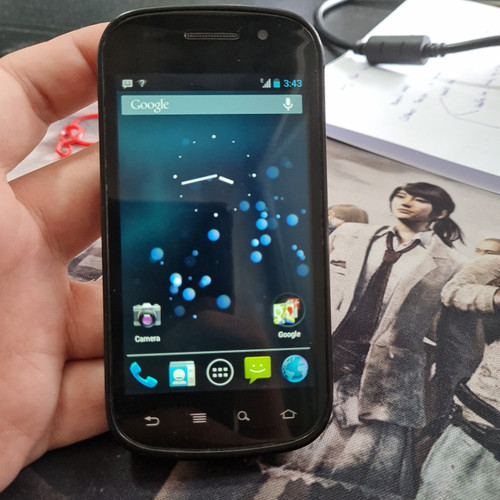
everybody came right here from Cuba King 77 dot-com below to do a video demonstrating how to unroot or unbreak your Galaxy Nexus whether it be a sprint model a Verizon design International any variations of the Galaxy Nexus this is the current as well as simplest technique to bring it back to full stock and much like out of package setups I do desire to make a quick note that it will certainly factory reset your device and also wipe your internal storage space so I have whatever supported on your computer just transfer all the data over in a details folder then you can transfer them back when you’re done so this will certainly once more clean whatever now I’m presently on a custom ROM and a 4.2 jellybean ROM so again it does not matter what they’ll sign up with if you simply supply rooted or anything so first off what you’re gon na require to do is established up the one fresh toolkit if you need assistance set downloading as well as installing it I’ll link to it in the summary where you can download it but if you require aid with it I will connect to my I believe Nexus 4 just how to path video clip or unroot video clip or I think it’s my course video clip revealing you just how to establish that up once again it’s for the Nexus 4 but at the start of it shows you just how to establish that path toolkit so if you require aid with that click on that
how to route video clip in the description of the video and also watch that while you’re establishing that toolkit when you have actually set it up you’re prepared to go most likely to your computer really prior to you most likely to your PC on your tool we’re gon na need to transform on USB debugging so to start with proceed as well as go right into setups and after that scroll all the method down and also we’re gon na need to activate developer choices to get USB debugging to reveal so go to about phone and also most likely to construct number and also rapidly touch on it seven times till it states you are now a developer and once you’ve done that you’ll see designer alternatives do reveal up click on those turn on developer alternatives and after that examine USB debugging and also struck alright so make certain USB debugging is checked once it is do not plug your tool in simply yet we require to establish up the chauffeurs first as soon as we have actually done that then you can plug it in yet go in advance as well as most likely to your computer ok once we’re at our computer system once again we should be this it states your design kind proceed and select the tool you have whether it be a GSM HSPA+ a Verizon One or a sprint version so I have this print variation so I’m gon na select that it says choose the Android develop you are currently running it’s very essential to pick the ideal one once again as I stated I’m gon na customized jellybean rom if you are an official construct proceed and select whatever main bills you are on but right now I’m gon na select the jellybean personalized ROM I’m gon na strike apply now it simply says to transform on USB debugging we’ve already done so
I’m gon na hit fine once you’ve hit OK we are all set to go go ahead as well as choose full driver setup guide what I recommend doing is missing this action – and also most likely to PB a web vehicle drivers and set those up I already have them established click those there’s in fact a detailed overview on setting up your PVA internet drivers see that to ensure that’s how you established PD an internet motorists when you’ve set them up now you can order your Galaxy Nexus and also connect your device into your computer you’ll you will certainly see up at the top it’ll in fact say USB debugging attached so once you speedy bugging is linked you recognize it exists we prepare to go so what we’re gon na require to do is go ahead as well as you’ll see them the right-hand man edge reviewed their soft bricked or tools on typical so pick whichever one you you are at and push the flash stock unroot once more it will completely clean your tool as I stated earlier devices on press ok if you’re all set to continue so currently its gon na proceed and also you wish to search for a factory picture I believe so it looks like there’s actually right here we go so what we can do is press this switch right below and also we want it to instantly download as well as draw out the manufacturing facility photo we want so choose right here and also then you’ll see a decrease down the current one is this f80 5 develop the 4.1.1 I’m gon na choose that as well as let it automatically download it for me so I’m.
gon na strike okay and after that it ought to bring up an automatic downloader it’s the Nexus manufacturing facility photo downloader below it is so once more ensure you don’t use don’t pick the fheo 5 develop of your Verizon Galaxy Nexus or as well as whatnot select whatever develop you want to go back to on your specific gadget that’s why we chose our version typed at the start of this video so I’m gon na let it download it’ll take a little bit of time these these pictures are quite huge but I’ll be back when it’s done ok so it just obtained done downloading you’ll see on a % it says total it’s gon na guy suit every little thing up as well as it says removing the image so as soon as the image is done remove actually just gon na begin right now so I believe it’s gon na reboot our Galaxy Nexus right into the bootloader once it totally acknowledges our gadget so it’ll say device attached rebooting right into the bootloader so let it do so and also here we go so we are in the bootloader again then it’s gon na acknowledge our device and also once it does it’ll raise a command punctual which will automatically blink all of the stock files on to our gadget again this will entirely clean our tool which is what it’s letting us understand currently press ok if you prepare and also it does bring up this command trigger as I mentioned so right here it is below’s the command prompt it brings up it writes the bootloader it reboots us back right into the bootloader waiting for tool and afterwards it will kind in those automatic command triggers for us blinking the system every little thing so this does take.
a bit of time this is where it is bringing it back to stock so make certain you do not unplug your device if for any kind of factor something occurs you may wish to attempt various cable television try various USB port also you can attempt re-installing the drivers so those are some troubleshooting actions with this toolkit however anyways I’m gon na allow it go through and also I’ll be back when it near is nearing conclusion okay so it completed flashing it claims rebooting you also see that lock is still down there so we’re not just done yet but it did finish up and did take a little time once again as I claimed discussed previously so when we’re done starting up you can actually press any type of essential to leave out of this so it additionally says you need to transform your design type so keep that in mind if you did alter again I got on a jelly bean ROM to ensure that’s what I changed it to today it’s that sort of different construct so I’m gon na transform that right there so make certain you do transform it to whatever develop that it did alter to so strike OK and also after that transform it to your details gadget and also whatever build you are on so ensure that does obtain transformed yet after that once it start up I will be right back ok so my tool to run it support you can proceed and set this up if you would love to understand even more customer data will certainly be cleaned but here we go again all you have to do is return into setups and go down to those programmer choices again as well as turning them on as well as see to it USB debugging is examined as soon as more so inspect USB debugging hit alright turn it back on and now we.
are prepared to go we require to do another action in fact we require to lock the bootloader so to get that padlock secured once again we need to press this OEM lock button in the lower right-hand corner hit alright and afterwards it claims examining ADB condition and also after that it’ll bring us back to the bootloader and also type in a fast command timely of fastboot OEM lock and after that that need to be it should reboot our tool as soon as more so once again in the bootloader let it key in that command alright so it is typing in it states it should now be actual act so that is it to validate it just inspect the boot screen press ok if you prepare to proceed and also then it will reboot our gadget once it boots up there we go no much more padlock down at the base so that is it that is the most up to date as well as easiest approach to unroot your unbreak your Google Galaxy Nexus gadget so if you have any kind of inquiries do not hesitate to ask leave a comment you can also sign up for me please do press that subscribe switch follow me on Facebook Twitter and Google+ all web links will remain in the summary of the video listed below as always many thanks make certain to give this a thumbs up.